给应用添加Selinux配置的完整记录
公司人力吃紧,特别缺少C开发的同学,只能是我是一块砖,哪里需要哪里搬!记录一次Android系统完整的配置开启启动应用,并配置Selinux权限的过程!
1、添加应用程序在vendor目录,编译生成可执行文件test_abc在/system/bin/中;
这里开始是参考网上的修改,但发现编译后并不能将test_abc可执行文件打包到/system/bin中;
aaa@abc-0C:~/work/ATOS_Q/vendor/test$ cat Android.mk
LOCAL_PATH := $(call my-dir)
PRODUCT_PACKAGES += \
test_abc
include $(call all-makefiles-under,$(LOCAL_PATH))
test_abc\目录下的文件:
Android.mk
test_abc.c
Android.mk文件:
LOCAL_PATH:= $(call my-dir)
include $(CLEAR_VARS)

LOCAL_SRC_FILES:= \
    test_abc.c

LOCAL_SHARED_LIBRARIES := \
    libcutils \
    libutils

LOCAL_C_INCLUDES += \
    bionic \

LOCAL_MODULE := test_abc
LOCAL_MODULE_TAGS := optional

LOCAL_MULTILIB := 64

include $(BUILD_EXECUTABLE)
test_abc.c中就是一个main方法,操作文件和socket;
解决test_abc不能打包到system/bin路径下的方法是将test_abc整个路径都移到了qcom的厂家路径下:
aaa@abc-0C:~/work/ATOS_Q/vendor/qcom/bonito/test_abc$ pwd
/home1/gwb/work/ATOS_Q/vendor/qcom/bonito/test_abc
aaa@abc-0C:~/work/ATOS_Q/vendor/qcom/bonito/test_abc$ ls
Android.mk test_abc.c
23 #lyz add for test
24 include vendor/xdja/test_abc/Android.mk
2、添加test_abc的权限定义:
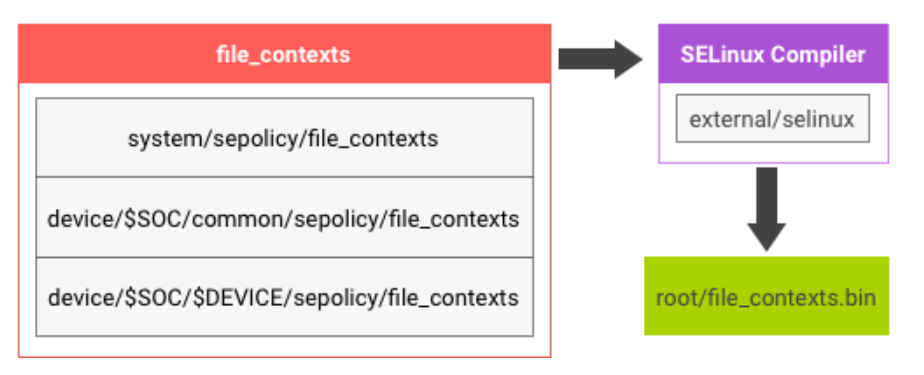
aaa@abc-0C:~/work/ATOS_Q$ vi device/google/bonito-sepolicy/vendor/qcom/sdm710/file_contexts
60 #lyz add for test
61 /system/bin/test_abc u:object_r:test_abc_exec:s0
3、添加开机启动,修改./system/core/rootdir/init.rc
#lyz add for test
service test_abc /system/bin/test_abc
class main
oneshot
seclabel u:r:test_abc:s0
4、添加te文件:
aaa@abc-0C:~/work/ATOS_Q$ cat device/google/bonito-sepolicy/vendor/qcom/common/test_abc.te
type test_abc, domain, coredomain;
type test_abc_exec, file_type, system_file_type, exec_type;
init_daemon_domain(test_abc)
5、编译验证,查看dmesg开机日志:
[ 9.191761] init: cannot setexeccon('u:r:test_abc_exec:s0') for test_abc: Invalid argument
问题应该是test_abc.te的路径不对,导致init启动时并不认识标签"u:r:test_abc_exec:s0"
修改第四步,将test_abc.te文件移到路径下/device/google/bonito-sepolicy/private 路径下,重新编译版本,下载启动;
aaa@xdja-0C:~/work/ATOS_Q/device/google/bonito-sepolicy/private$ pwd
/home1/gwb/work/ATOS_Q/device/google/bonito-sepolicy/private
6、查看dmesg开机日志,终于出来期望的deny日志:
Line 2077: [ 9.178268] type=1400 audit(258.270:14): avc: denied { dac_override } for comm="test_abc" capability=1 scontext=u:r:test_abc:s0 tcontext=u:r:test_abc:s0 tclass=capability permissive=0
Line 2078: [ 9.178488] type=1400 audit(258.273:16): avc: denied { dac_override } for comm="test_abc" capability=1 scontext=u:r:test_abc:s0 tcontext=u:r:test_abc:s0 tclass=capability permissive=0 duplicate messages suppressed
Line 2079: [ 9.178500] type=1400 audit(258.273:17): avc: denied { create } for comm="test_abc" scontext=u:r:test_abc:s0 tcontext=u:r:test_abc:s0 tclass=tcp_socket permissive=0
Line 2158: [ 9.609626] type=1400 audit(258.273:17): avc: denied { create } for comm="test_abc" scontext=u:r:test_abc:s0 tcontext=u:r:test_abc:s0 tclass=tcp_socket permissive=0
7、修改test_abc.te 增加test_abc的相关权限,编译版本,重新进行验证:
#============= test_abc ==============
allow test_abc self:capability dac_override;
allow test_abc self:tcp_socket create;
8、解决/system不能root的问题:
E:\source\dual_os>adb root
restarting adbd as root
E:\source\dual_os>adb remount
W Disabling verity for /system
E Skipping /system
W Disabling verity for /vendor
E Skipping /vendor
W Disabling verity for /product
E Skipping /product
W No partitions to remount
/system/bin/remount exited with status 7
remount failed
system路径root失败!
解决:
首先进入开发者模式,开启OEM选项,
然后adb reboot bootloader
然后fastboot flashing unlock
然后fastboot getvar unlocked
等待结果一般会出现yes,如果不是yes可能又需要百度解决这个问题
之后重启,然后adb root , adb disable-verity, 然后重启 adb remount就可以挂载了
adb remount失败,可以使用diable-verity
C:\Users\li>adb disable-verity
verity is already disabled
using overlayfs
Now reboot your device for settings to take effect
E:\source\dual_os>adb root
restarting adbd as root
E:\source\dual_os>adb remount
remount succeeded
E:\source\dual_os>
E:\source\dual_os>adb push E:\source\dual_os\test_abc /system/bin
120 KB/s (11560 bytes in 0.093s)
E:\source\dual_os>adb shell reboot
E:\source\dual_os>
Selinux的概念甚多,理解起来还是很费劲的!并且需要有Linux内核的基础知识,总归来说是打通任督二脉的一件事,多多学习总是没有坏处的!
----------------------------------2021/12/09-----------------
修改never allow规则:
--- a/system/sepolicy/public/domain.te
+++ b/system/sepolicy/public/domain.te
@@ -1191,6 +1191,7 @@ neverallow {
-init
-runas
-zygote
+ -abc_service
} shell:process { transition dyntransition };
/system/sepolicy# cat public/abc_service.te
type abc_service, domain;
type abc_service_exec, system_file_type, exec_type, file_type;
system/sepolicy# cat private/abc_service.te
typeattribute abc_service coredomain;
init_daemon_domain(abc_service)
Changes not staged for commit:
(use "git add <file>..." to update what will be committed)
(use "git checkout -- <file>..." to discard changes in working directory)
modified: prebuilts/api/29.0/private/file_contexts
modified: prebuilts/api/29.0/public/domain.te
modified: private/compat/26.0/26.0.ignore.cil
modified: private/compat/27.0/27.0.ignore.cil
modified: private/compat/28.0/28.0.ignore.cil
modified: private/file_contexts
modified: public/domain.te
Untracked files:
(use "git add <file>..." to include in what will be committed)
prebuilts/api/29.0/private/abc_service.te
prebuilts/api/29.0/public/abc_service.te
private/abc_service.te
public/abc_service.te
--- a/system/sepolicy/private/compat/27.0/27.0.ignore.cil
+++ b/system/sepolicy/private/compat/27.0/27.0.ignore.cil
@@ -187,6 +187,8 @@
wm_trace_data_file
wpantund
wpantund_exec
+ abc_service
+ abc_service_exec
wpantund_service
wpantund_tmpfs))

参考 :
https://source.android.google.cn/security/selinux/customize
https://www.cnblogs.com/schips/p/android_add_custom_service_when_system_init.html
-------------------广告线---------------
项目、合作,欢迎勾搭,邮箱:promall@qq.com
本文为呱牛笔记原创文章,转载无需和我联系,但请注明来自呱牛笔记 ,it3q.com
- 上一篇: 为什么领导不推荐使用新的框架或者新的平台?
- 下一篇: 靠谱的SeLinux强制访问控制技术

- 最新评论
- 总共0条评论


